DIY, Occasion, Ramadan, Ramadan Calendar
DIY RAMADAN CALENDAR | CRYSTAL BALLS
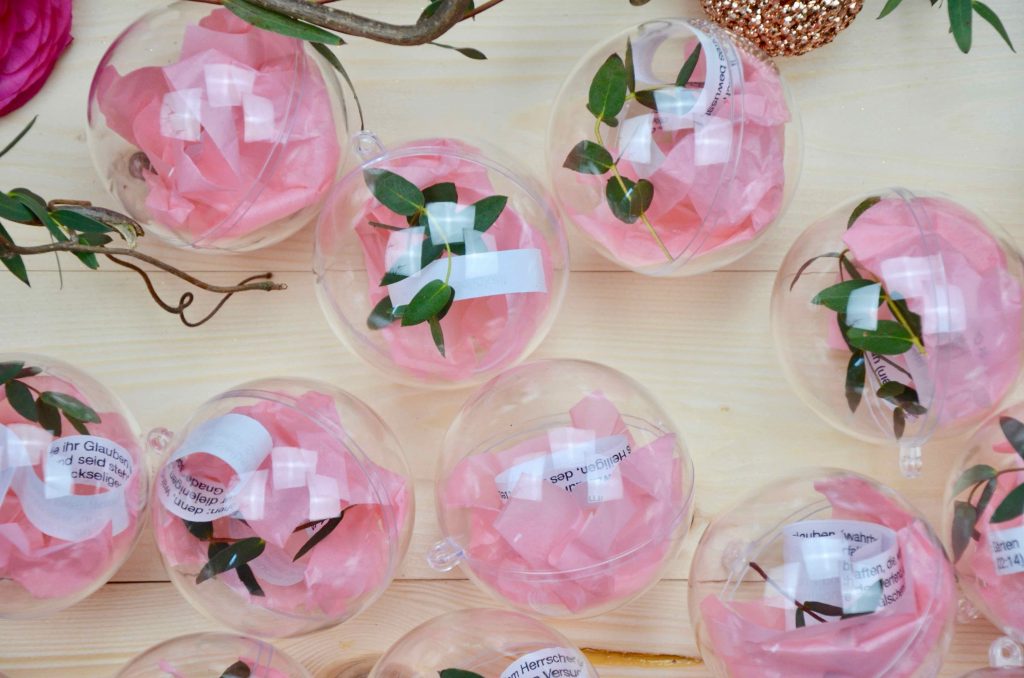
Ramadan is just around the corner. Having a Ramadan calendar has already become a beautiful tradition in our family, so much that every family member looks forward to it each year. I especially enjoy creating our Ramadan calendars myself and coming up with crafting ideas that are easy to implement with children. Today I will show you a DIY Ramadan calendar made out of crystal balls that you can individually fill up.
DIY RAMADAN CALENDAR | CRYSTAL BALLS

YOU WILL NEED:
- 30 Crystal balls
- Nylon thread
- Silk paper
- 30 labeled pieces of paper
- Eucalyptus branches
- Corkscrew branch
- Scissors

THE BALLS
You can simply order the balls here. Keep in mind that you will be needing 30 balls. Each day needs to have one ball. (In some years you will only need 29.) The balls can be divided into two halves. You can open and close them again. Additionally, you should make sure that the balls have a loop so they can get hung up.

CUTTING OUT PIECES OF PAPER
Theoretically, the crystal balls can be filled with many differnet things. The version I liked the most is the one with small messages written on pieces of paper. Of course, you will also need about 30 or 29 of them.

In order to make it a bit more personal, you can use handwritten messages. Thus, the crystal ball Ramadan calendar is also a nice gift idea for adults who would like to enjoy the anticipation of the holy month of Ramadan. I decided to use Quran verses. But duaa’s (supplications) or hadiths are a nice idea as well.

If you want to create a more visual effect, just take a pencil and roll up a piece of paper with it. Roll up each side up-to the middle section in order to create a curvy s- shape.
FILLING THE BALLS
In order to give the balls more color and structure, just crumple a piece of silk paper and stick it into the balls, together with the other things.

HANGING UP THE BALLS
In order to attach the balls to the corkscrew branch, it’s most suitable to use a nylon thread. This is transparent and doesn’t stand out too much. By the way, you can get a corkscrew branch at the florist’s for 5 – 8 Euros. Attach all the balls to the branch and stick everything to the ceiling.

ALREADY FINISHED!
Your beautiful Ramadan calendar is finished. It’s a special visual highlight. I am already excited to open up a ball every evening after Iftar together with my loved ones.


YouTube VIDEO
Would you like to see the instructions on video? With pleasure! Definitely check out mydattelbeereYouTube channeland watch the videos showing my DIY crafting ideas. Of course, I would be even more delighted if you subscribe to it, since the dattelbeere community should grow there as well.
I hope you like this DIY Ramadan calendar and that you found an inspiration for your own Ramadan calendar. If you create this DIY Ramadan calendar yourself, I would be very excited if you could tag it with @dattelbeere via Instagram. This is how you can help many more people to benefit from creative DIY Muslim projects & ideas.
Lots of Love and Salam
Your Vanessa

